

[ad_1]
Windows 11 has come out with new and exciting features, including a few changes to the user interface. However, not all the tweaks have simplified things. For instance, the platform has now ditched the old classic context menu. To access the File Explorer context menu now, you have to right-click and navigate to “Show more options.” While the feature isn’t bad, it simply means more work for some users.

If you love a neat and condensed context menu, this article can help. You’ll learn how to disable the Windows 11 “Show more options” feature in several ways. You’ll also learn how to enable it again if you change your mind regarding the feature. Keep reading to find out more.
Disabling Show More Options
Fortunately, Windows 11 allows you to disable the “Show more options” menu, and the process is relatively easy. Here’s how to go about it:
- On your computer, open “File Explorer.”

- Tap the three dots in the top right corner of the screen to open the menu.

- Select “Options.”

- Open the “View” tab and scroll down to “Advanced settings.”

- From the options, select “Launch folder windows in a separate process.”

- Click the “OK” button and restart your computer.

With the above option enabled, you should now see the old classic menu back again. If the changes don’t occur right away, be sure to restart your File Explorer or your computer entirely.
How to Disable Show More Options on Windows 11 Using a Registry File Editor
Alternatively, you can use a third-party program to disable the “Show more options” context menu. One such program is MajorGeeks’ registry file editor. Here’s how to use the program to disable the “Show more options” context menu on Windows 11:
- Download MajorGeeks’ registry file editor.

- Extract and open the downloaded files. Right-click and select “Show More Options.”

- From the pop-up, select “Run as administrator.”

- Allow the program to make changes to your device by clicking “Yes.”

If the “Show more options” context menu doesn’t disappear immediately, consider restarting “File Explorer.” Alternatively, you can restart your computer entirely.
How to Enable Show More Options on Windows 11 Using a Registry File Editor
If you change your mind about the “Show more options” context menu, you can easily switch back to the feature using the MajorGeeks’ registry file editor. Here’s how to go about it:
- Open the folder containing the files you downloaded from the MajorGeeks website in the subsequent step.

- From the options, right-click and select “Show More Options.”
- From the pop-up modal, select “Run as administrator.”
- Allow the program to make changes to your device by selecting “Yes.” Be sure to restart File Explorer if the changes you just made don’t occur immediately.
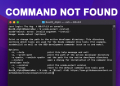
How to Disable Show More Options Using the Command Prompt
Whether you’re an advanced user or just love using the command prompt, there is a way to disable the “Show more options” context menu from it. Here’s how to go about it:
- On your computer’s search bar, type in “Command prompt.”

- From the options, select “Run as administrator.”

- In the CMD window type in “
reg delete HKCUSoftwareClassesCLSID{86ca1aa0-34aa-4e8b-a509-50c905bae2a2}InprocServer32 /ve /d "" /f”. After typing restart your computer for the changes to take effect.
Please note that the “HKCU” in the above command stands for “HKEY_CURRENT_USER.”
Bring Back the Old Good Friend
While Windows 11 has many excellent features, getting used to some of them can be quite a hassle. Fortunately, you can always revert to the old context menu by using a third-party reg file editor or doing it yourself by simply changing the context menu settings. Whatever your preference, we hope you can now use the old classic menu on your Windows 11.
Have you tried disabling the “Show more options” context menu in Windows 11? Please let us know in the comments section below.
[ad_2]
Source link


