

[ad_1]
Some software requires you to disable your antivirus during installation. Here are two ways to do that for both the free and paid versions of Avast.
Like all full antivirus suites with real-time scanning, both the free and paid-for editions of Avast take over from Windows Defender in protecting your PC and monitoring for malware.
Sometimes you’ll want to disable it entirely for a few minutes to follow the installation requirements of another piece of legitimate software that needs to modify your registry, Windows services, or other tasks that may trigger behavioural threat detection in your antivirus.
You may also wish to do this so you can run software that you know to be safe, but which Avast might class as potentially unwanted and quarantine. However, I strongly advise against disabling your antivirus to run a potentially unwanted program unless you’re a developer or a software professional working with trusted – or at least known – material, ideally on an air-gapped system

Kaspersky Anti-Virus – Now 80% off
Essential Virus Protection
Our 5-star rated anti-virus blocks malware and viruses in real time and stops hackers, now 80% off at just £5 per year
- CODE: K80off22
- Was £24.99
- £5 per year
What we used
- Any Windows 10 or 11 computer with Avast installed
The Short version
- Open Avast’s right-click notification area menu
- Select how long you want to disable shields for
- Confirm that you wish to disable all shields
- Re-enable Avast’s shields
-
Step
1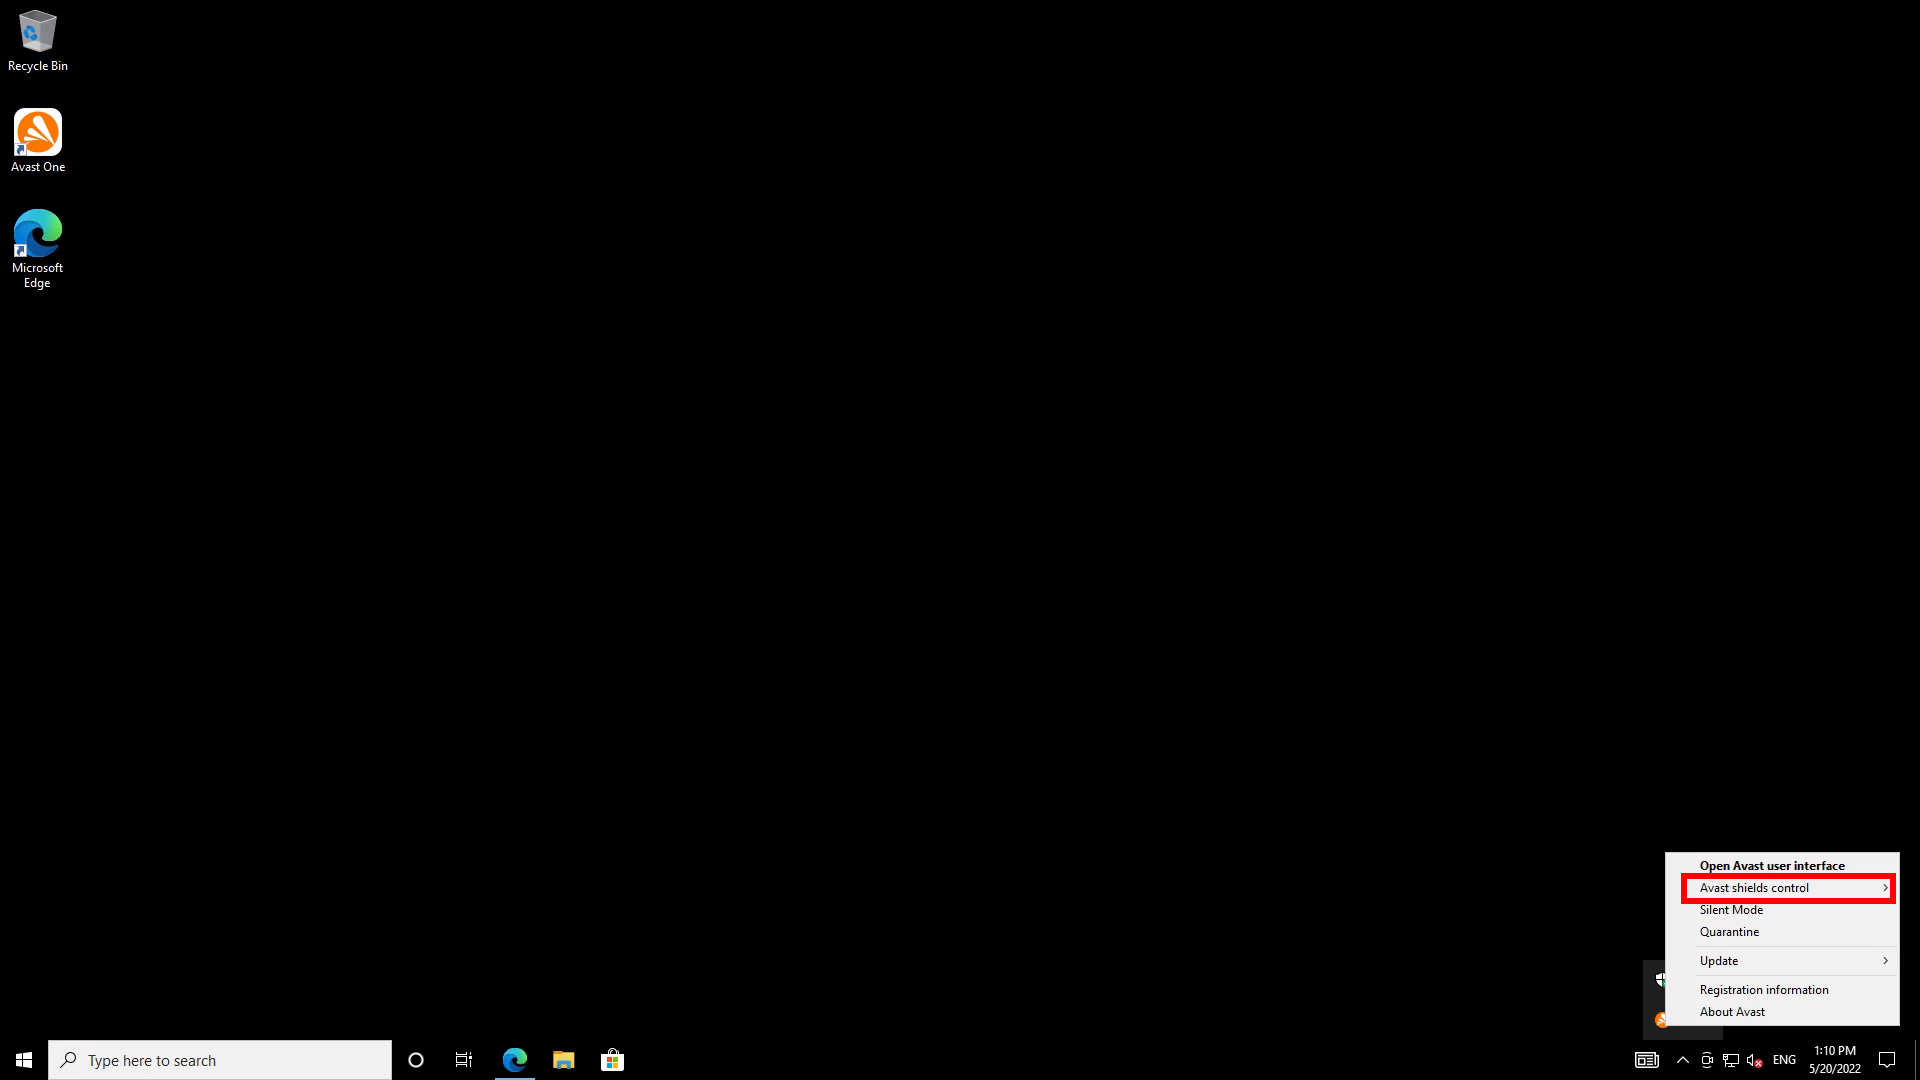
Click on the ^ arrow in Windows’ notification area at the bottom right of the screen, then right-click on Avast’s icon to open a menu. From here, click on “Avast shields control.”
-
Step
2Select how long you want to disable shields for

A sub-menu will ask if you wish to disable shields for 10 minutes, an hour, until the next reboot, or permanently (until you manually re-enable them). I recommend avoiding the last one, as it’s easy to forget that you’ve disabled your AV. I’ll opt for 10 minutes in this example.
-
Step
3Confirm that you wish to disable all shields
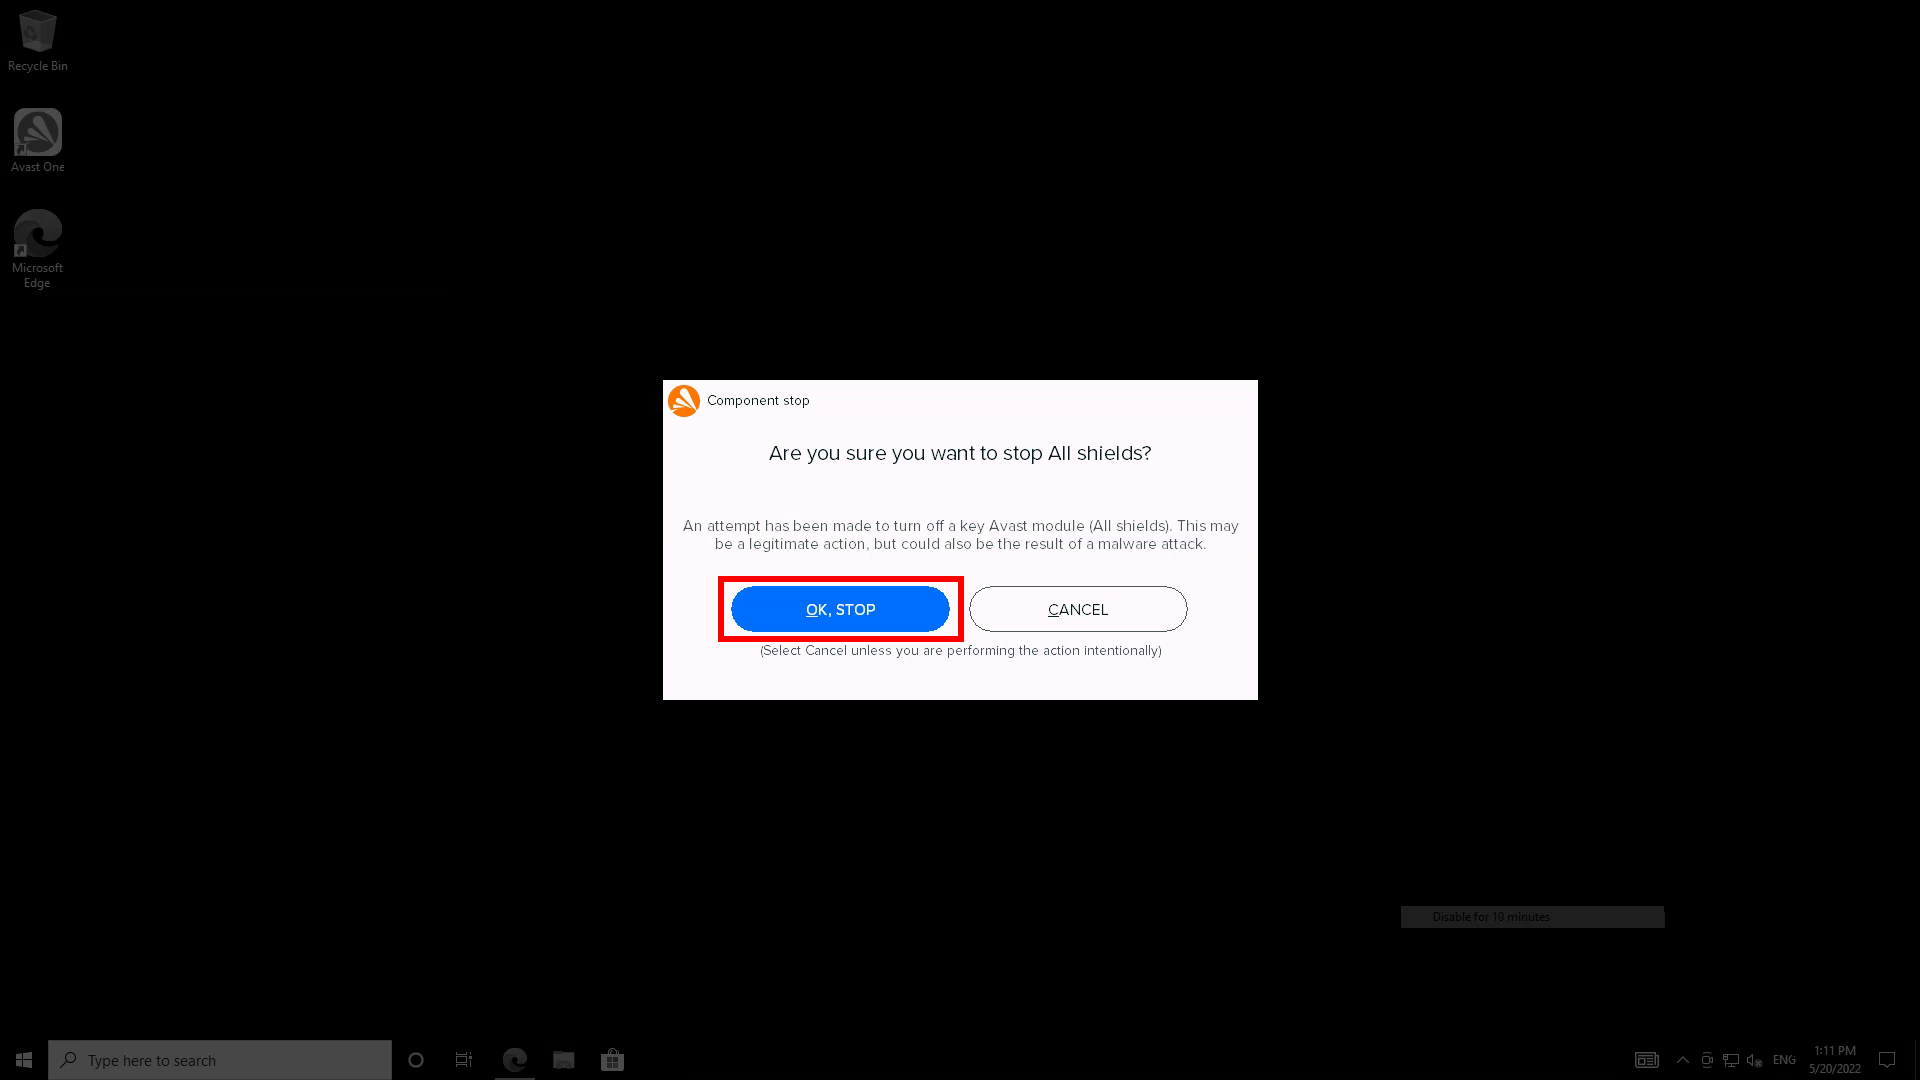
A pop-up will appear asking if you want to do this. Click the OK, STOP button. Windows pop-ups just above the notification area will invite you to turn on virus protection, as you currently don’t have any.
-
Step
4Re-enable Avast’s shields
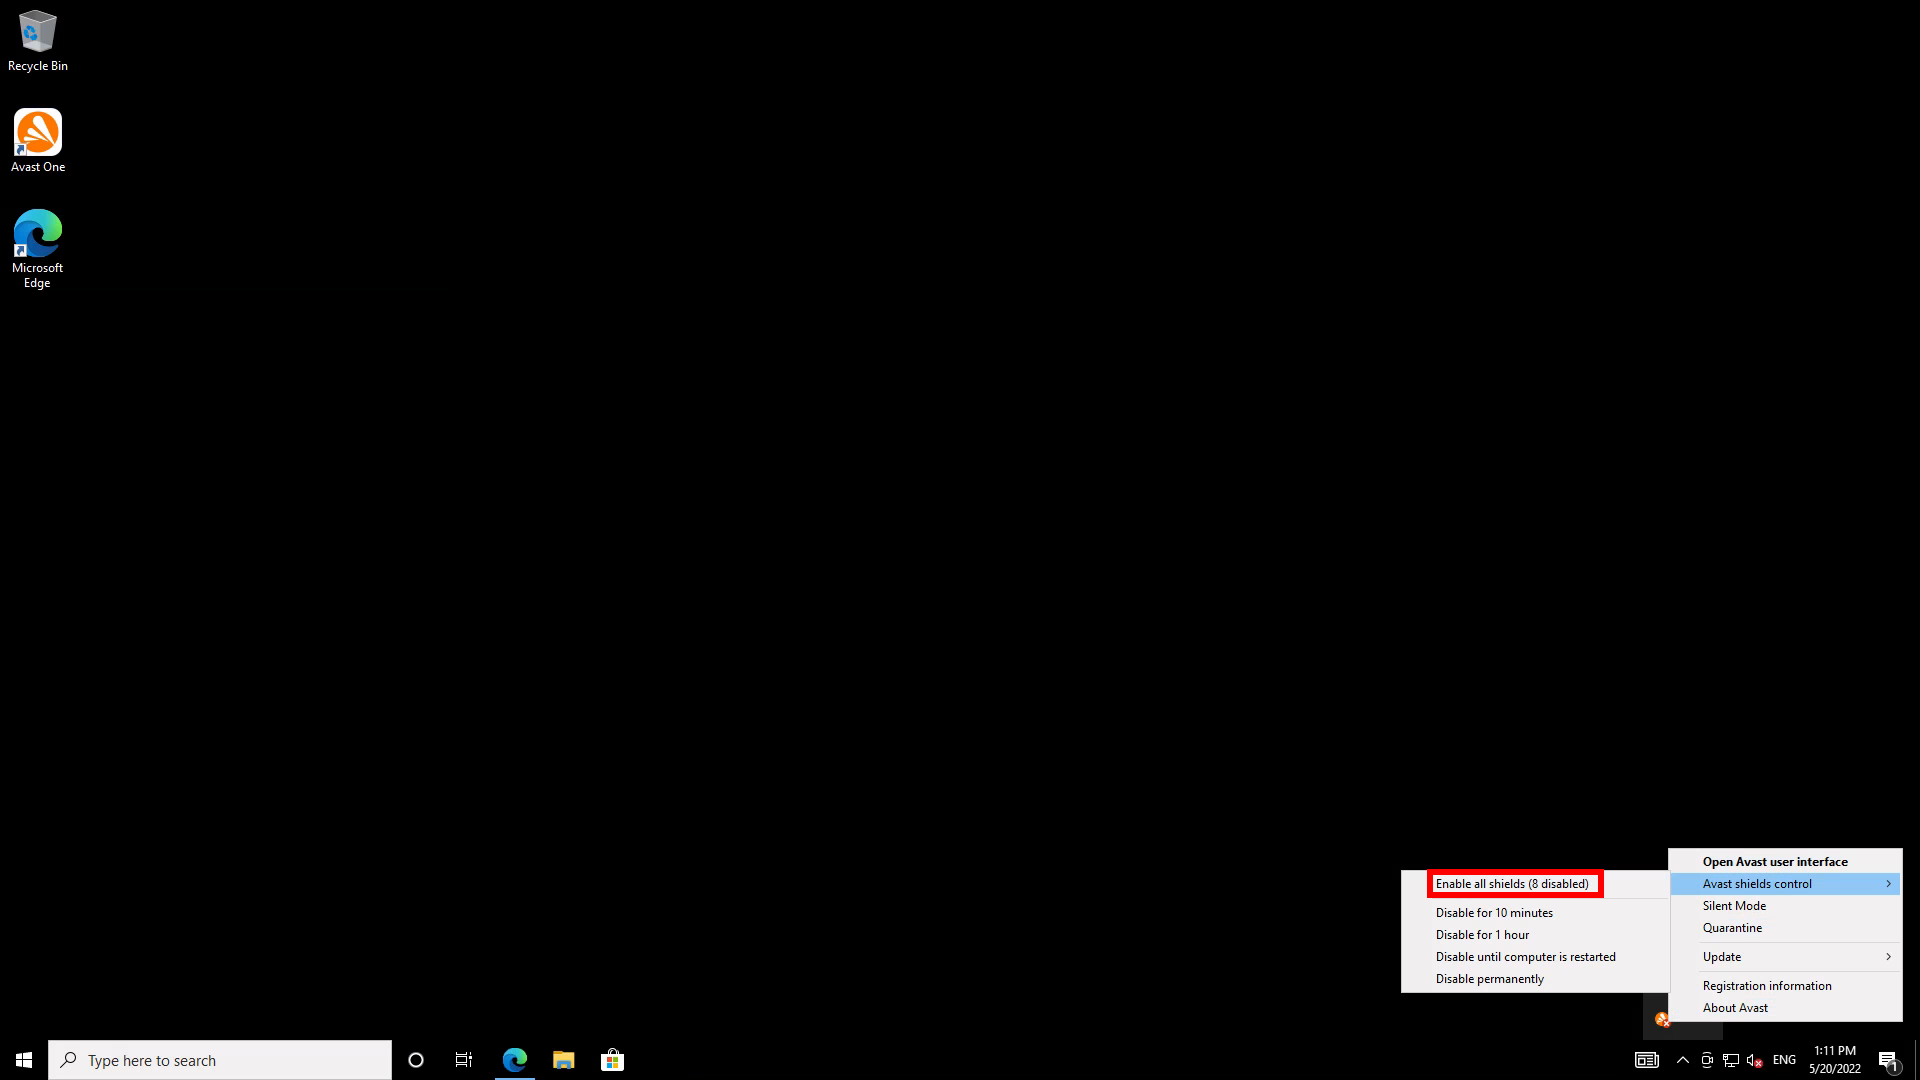
When you’ve finished the operation that required you to shut down Avast’s malware defenses, re-open Avast’s notification area right-click menu, go to Avast shields control and click “Enable all shields”.
Kaspersky Anti-Virus – Now 80% off
Essential Virus Protection
Our 5-star rated anti-virus blocks malware and viruses in real time and stops hackers, now 80% off at just £5 per year
- CODE: K80off22
- Was £24.99
- £5 per year
Troubleshooting
You can also disable Avast’s shields through the main Avast client’s Settings menu and, on a more granular basis, via the Core Shields options in its Protection tab.
On Windows 10 and Windows 11, it’s rare to encounter software that really does need you to disable your antivirus, so unless there’s very specific reasoning as to why this is necessary, or a particularly dire warning, I would first attempt installation without disabling your AV.
[ad_2]
Source link


